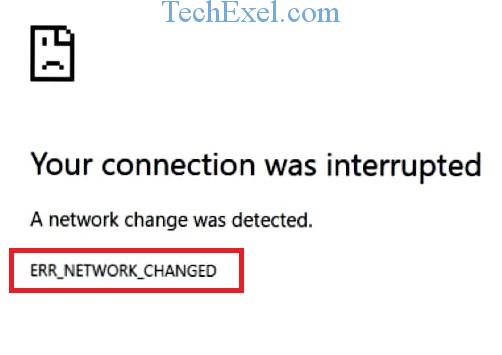
“ERR_NETWORK_CHANGED” error is common with Windows 10 operating system. This error pops up when you want to surf the internet. Even the windows troubleshoot feature can’t solve this error. So try out the below solutions to solve this error.
Contents
Solution 1 ⇒ Restart Your Router
Step 1 ⇒ First remove the power cord from your router.
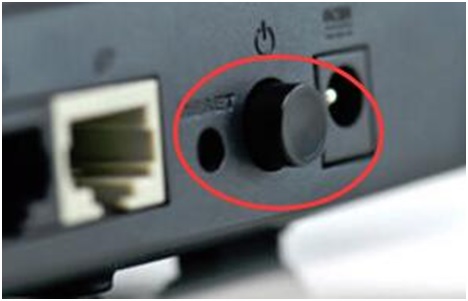
Step 2 ⇒ Then wait for 30 seconds.
Step 3 ⇒Finally reconnect the power cord to the router.
Solution 2 ⇒ Reset IP address
Step 1 ⇒ First open the Start menu.
Step 2 ⇒ Then type Run in the search box and press Enter key.
Step 3 ⇒ Then, in the Run window type cmd and press Enter key.

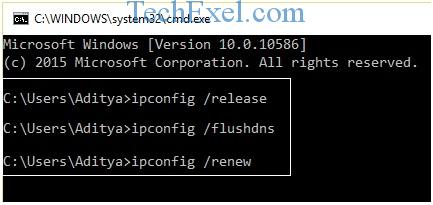
Step 4 ⇒ In the command prompt window, type the following commands and don’t forget to press the Enter key after each command.
ipconfig /flushdns
ipconfig /registerdns
ipconfig /renew
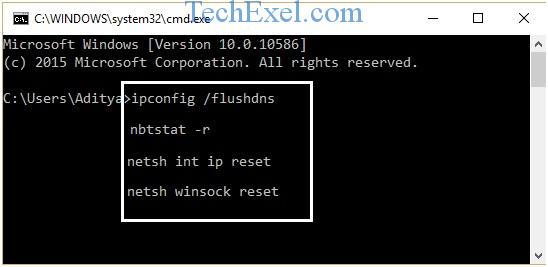
Step 5 ⇒ Then close the command prompt window. Once again open it, type the following commands and don’t forget to press the Enter key after each command.
ipconfig /flushdns
nbtstat –r
netsh int ip reset
netsh winsock reset
Step 6 ⇒ Finally, press the Enter key and reboot your operating system.
Solution 3 ⇒ Manually Change Your DNS Server
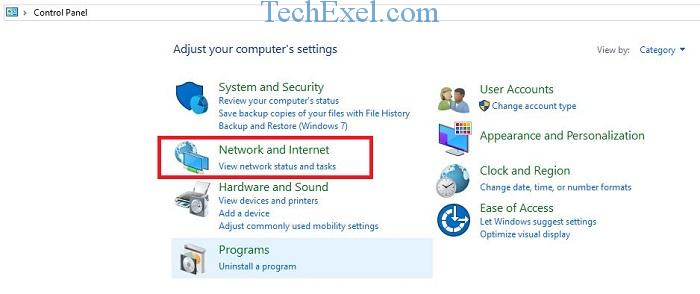
Step 1 ⇒ First, click the Start icon and open the Control Panel.
Step 2 ⇒ Then select Network and Internet tab from the Control Panel window.
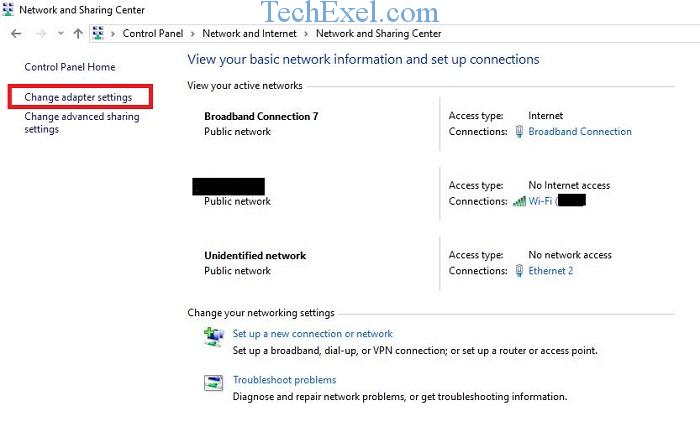
Step 3 ⇒ Now select Change Adapter Settings present on the left pane of Network and Sharing Center window.
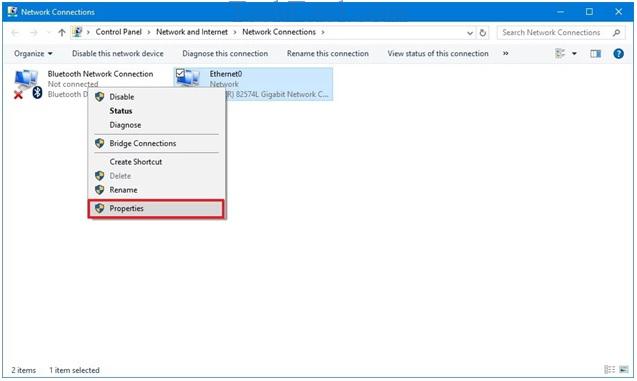
Step 4 ⇒ Do a right-click on the network interface connected with the internet and select the Properties option.
Step 5 ⇒ Then click on IPv4 and select Properties.
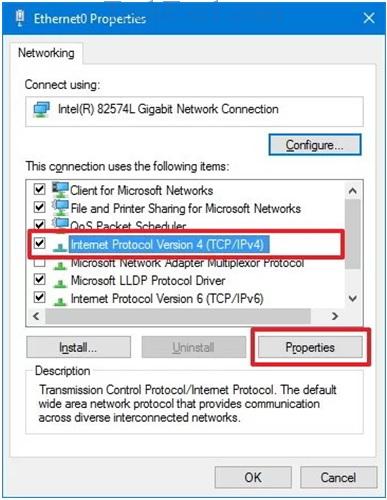
Step 6 ⇒ Type your Preferred DNS server address and Alternate DNS server.
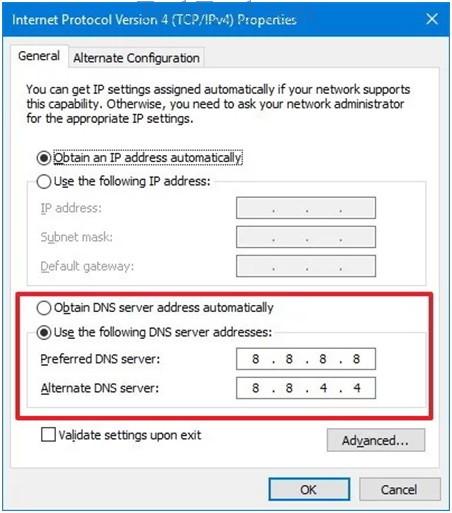
Step 7 ⇒ Finally, click the OK icon.
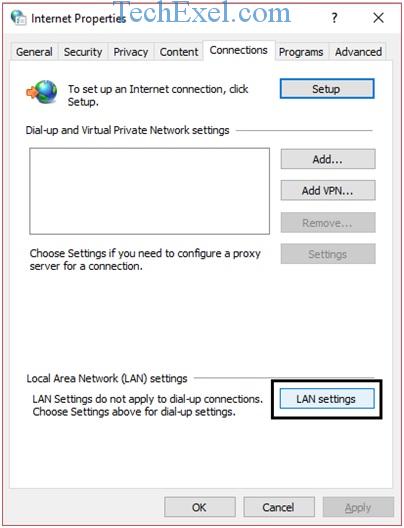
Solution 4 ⇒ Change Proxy Settings
Step 1 ⇒ First open the Start menu.
Step 2 ⇒ Then type Run in the search box and press Enter key.
Step 3 ⇒ Then, in the Run window type inetcpl.cpl and press Enter key.
Step 4 ⇒ Now click on the Connections tab and select the LAN settings.
Step 5 ⇒ Afterwards uncheck the box with Proxy Server and check the box with Automatically detect settings.
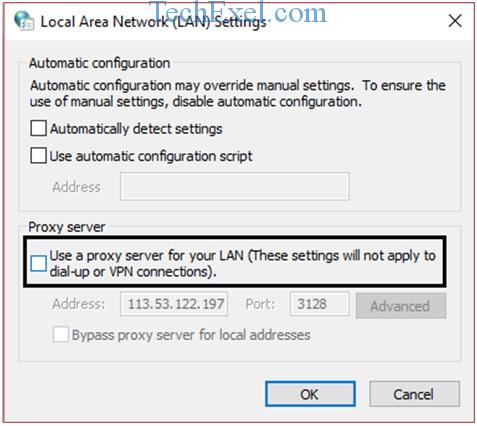
Step 6 ⇒ Finally, save the changes and reboot your operating system.
Solution 5 ⇒ Clear Chrome Browser Data
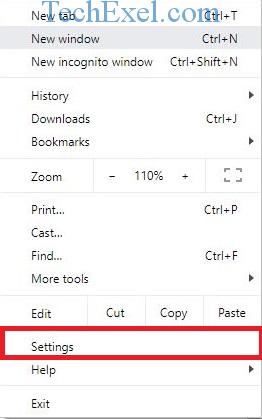
Step 1 ⇒ First open your Chrome browser.
Step 2 ⇒ Then click on the menu icon and select Settings.
Step 3 ⇒ After that, click on Show Advanced Settings.
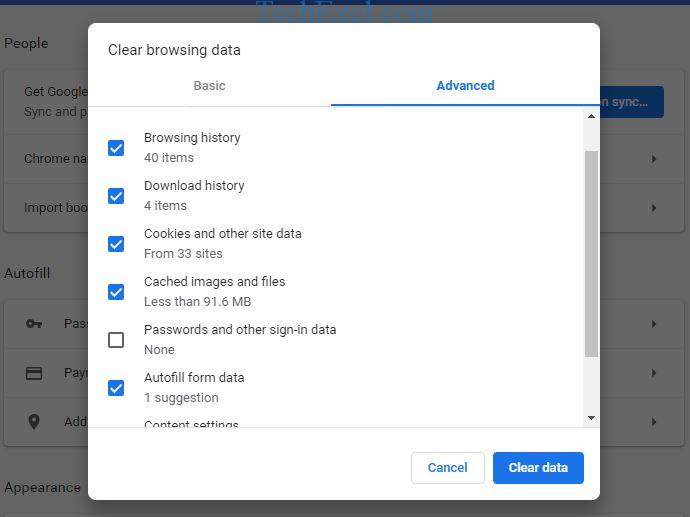
Step 4 ⇒ Then, in the Privacy section, click on Clear browsing data icon.
Step 5 ⇒ Check the boxes which contain history, cookies, passwords, and cache files to delete.
Step 6 ⇒ Finally restart your browser.
Solution 6 ⇒ Delete WLAN Profiles
Step 1 ⇒ First open the Start menu.
Step 2 ⇒ Then type Run in the search box and press Enter key.
Step 3 ⇒ Then, in the Run window type cmd and press Enter key.
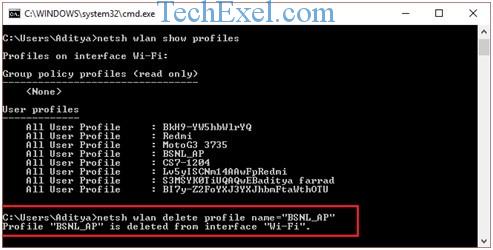
Step 4 ⇒ In the command prompt window, type the following command netsh wlan show profiles and press the Enter key.

Step 5 ⇒ Finally to remove Wi-Fi profiles, type the following command netsh wlan delete profile name= [PROFILE NAME]. Do this for all Wi-Fi profiles.
That’s it, and the above solutions will solve the “ERR_NETWORK_CHANGED” error permanently. Still, any query or doubt then do post.
