Making gravy from water alone couldn’t be simpler than with this method. The finest flavor and a rich brown color come from using chicken AND beef stock cubes. It just takes 4 minutes and tastes better than KFC’s gravy. There is no need for any pan juices.
Gravy is a versatile and savory sauce that enhances the flavor of countless dishes, from mashed potatoes to roast meats. Whether you’re a seasoned chef or a beginner in the kitchen, understanding the basics of gravy is essential.
In this informative guide, we’ll explore what basic gravy is, how to make liquid gravy, the debate between water and milk, tips for achieving the perfect thickness, and the various types of basic gravies.
Contents
What Is Basic Gravy?
Basic gravy is a classic sauce made from a few fundamental ingredients: fat, a thickening agent, and liquid. It serves as a rich and flavorful accompaniment to numerous dishes, providing moisture and enhancing their taste. Gravy can be tailored to suit different cuisines and dishes, making it a versatile addition to any meal.
How To Make Gravy From Scratch
You may use this gravy recipe to make something that tastes just like KFC’s Potato and Gravy in a tub. Those of you who never eat fast food may have no idea what you’re missing out on.
Read Also:
- How To Make A TV in Minecraft
- How To Make Sun With Little Alchemy
- How To Make White Concrete in Minecraft
Just know that it is reliably good, expertly seasoned, and can make anything great, as is to be expected from KFC. Using both chicken and beef stock cubes (bouillon cubes) is the key to this gravy’s success.
How to Make Gravy From Scratch: Ingredients Needed
Here are the staples for our quick and easy homemade gravy, and if you want to amp up the flavor even more, I’ve included some suggestions.
Butter and all-purpose flour A roux is a paste made from butter and all-purpose flour that is used to thicken liquids like broth into a smooth gravy. See my suggestions below for making gluten-free or butter-free gravy.
Warm stock or broth You can use chicken, beef, or vegetable stock for the one I stated earlier. Pan drippings can also be used.
Salt and fresh ground black pepper Making ensuring the gravy isn’t under seasoned requires salt and freshly ground black pepper.
Optional Ingredients (Flavor Enhancers)
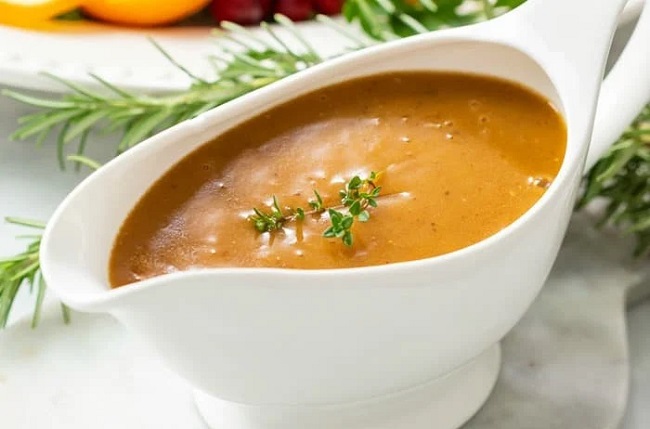
Fresh or dried herbs Gravy is much improved by the addition of herbs like sage, thyme, or rosemary, either fresh or dried. When I’m creating turkey gravy, I love to use sage.
Half and half or cream The gravy will be especially rich and velvety if you add half and half or cream right before serving.
Mushroom powder, Worcestershire sauce or fish sauce It may seem strange to add mushroom powder, Worcestershire sauce, or fish sauce to gravy, but they all contribute a savory, umami flavor. Mushroom powder is a common ingredient in many of our dishes; you can find it at grocery stores, health food stores, and even online. We use Worcestershire sauce and fish sauce frequently in our own cooking. A pinch can bring out the full flavor of an otherwise bland meal.
The Steps For Making Perfect, Creamy Gravy
Don’t panic if you’ve never attempted to make gravy before. Making gravy is a breeze. In little time at all, you’ll have mastered it. It won’t take more than 10 minutes to complete the procedure, so come on!
Step 1: First, mix the melted butter and flour together until you get a smooth mixture. This paste (also known as a roux) is used to thicken the stock, resulting in a velvety gravy. I do this by melting butter in a skillet over medium heat and whisking in the flour. In my opinion, two minutes is plenty of time to fry the butter and flour. The paste’s color will change significantly as a result. The search is on for a blonde shade.
Step 2: Blend in the liquid that has accumulated in the roasting pan. Adding the liquid while it’s still warm helps it blend more easily with the butter and flour. The gravy thickens as the liquid boils and simmers. The gravy is ready after only one minute of simmering.
Step 3: Add salt, pepper, and other seasonings to taste. The gravy should be sampled before being served. If the dish is missing taste, try adding salt, herbs, or umami enhancers such as mushroom powder, fish sauce, or Worcestershire sauce.
Step 4: Pour in some cream or half-and-half. Even while it’s not required, it’s highly recommended because it makes the gravy rich and velvety.
How To Make Gravy With Pan Drippings
I’ve already indicated that our gravy recipe works just as well with or without the use of pan drippings. The dish we recommend for cooking a whole roasted chicken is pictured below. Chicken and pan juices are packed with flavor thanks to roasting on a bed of onions.
Instead of throwing away all that flavor, here’s how I make a gravy out of it. The first thing I do is drain the fat from the bottom of the roasting pan and reserve the broth. To remove the excess fat from the remnants at the bottom of the pan, I usually use a spoon.
After that, I filter out any residual liquid. Both the fat I reserved and the liquid I strained can be used in place of the butter in the recipe. Gravy fat separators (like the one made by OXO) can be purchased if you prefer not to use a spoon to separate the fat from the liquid.
Make the gravy in the roasting pan or Dutch oven you used if it can go from oven to burner. The accumulated taste at the pan’s or dish’s base is exactly what you want. We cooked our chicken in a baking dish, but you’ll need a skillet to make the gravy.
How to Make Liquid Gravy
Making liquid gravy is a straightforward process. Here’s a basic recipe:
Ingredients:
- 2 tablespoons of fat (pan drippings, butter, or oil)
- 2 tablespoons of all-purpose flour
- 1 cup of liquid (broth, stock, or pan juices)
- Salt and pepper to taste
Steps:
- Prepare the Fat: In a saucepan, melt the fat over medium heat. If using pan drippings from a roast, use the same pan in which you cooked the meat.
- Add the Flour: Gradually add the flour to the melted fat, stirring constantly to create a smooth paste (roux). Cook the roux for a few minutes until it turns a light golden color, ensuring that it doesn’t burn.
- Incorporate the Liquid: Slowly pour in the liquid while continuing to stir. This step prevents lumps from forming. Broth, stock, or pan juices are commonly used liquids, each imparting its unique flavor.
- Simmer and Season: Allow the mixture to simmer, stirring occasionally, until it reaches your desired consistency. Season with salt and pepper to taste.
- Strain (Optional): For a smoother texture, you can strain the gravy to remove any lumps or solids before serving.
Is Gravy Better with Water or Milk?
The choice between water and milk for gravy depends on personal preference and the dish you’re preparing. Here’s a general guideline:
- Water: Water creates a lighter and more neutral base for gravy. It allows the flavors of the meat or other ingredients to shine through. Water-based gravies are commonly used in recipes like chicken gravy.
- Milk: Milk, or a combination of milk and water, can be used to make creamier gravies. Milk adds richness and a creamy texture to the sauce. Milk-based gravies are often used for dishes like biscuits and gravy or creamy pasta sauces.
Ultimately, the choice between water and milk depends on the desired flavor and texture of the gravy you’re aiming to achieve.
How to Make Thick Gravy
Achieving the perfect thickness for your gravy is crucial. Here are some tips for making thick gravy:
- Adjust the Roux: If your gravy is too thin, you can thicken it by adding more roux (melted fat and flour mixture). Mix equal parts fat and flour separately and gradually whisk them into the simmering gravy until the desired thickness is reached.
- Cornstarch Slurry: Create a slurry by mixing cornstarch with cold water (1:1 ratio). Gradually add the slurry to the simmering gravy while stirring continuously. The mixture will thicken as it heats.
- Simmer and Reduce: Allowing the gravy to simmer for an extended period will reduce it, making it thicker. Be patient, as this method takes time.
- Use Cream or Milk: If you want a creamier and thicker gravy, you can incorporate cream or milk into the recipe. This will not only thicken the gravy but also provide a richer texture.
Types of Basic Gravies
Basic gravies come in various forms, each with its unique flavor profile:
- Brown Gravy: Made from meat drippings or broth, brown gravy has a savory, meaty taste. It’s often served with roasted meats like beef or turkey.
- White Gravy: White gravy, also known as country gravy, is creamy and made with milk or cream. It’s a staple in Southern cuisine and is commonly served with biscuits, fried chicken, or mashed potatoes.
- Mushroom Gravy: Mushroom gravy features sautéed mushrooms, adding a earthy, umami flavor to the sauce. It pairs well with poultry, beef, or meatloaf.
- Onion Gravy: Onion gravy is made by caramelizing onions and then incorporating them into the gravy. It has a sweet and savory taste, perfect for accompanying sausages or pork chops.
- Vegetable Gravy: Ideal for vegetarians, vegetable gravy is made using vegetable broth or stock. It’s a versatile option suitable for many meatless dishes.
Read Also:
Conclusion
Roasts can be used in numerous gravy preparations. Some of them can become rather involved. We just do basic stuff. The juices left in the pan are perfect for making a rich, flavorful gravy.
When the roast is done, it is transferred to a cutting board for resting. While the roast is cooling, we begin preparing the gravy by heating the roasting pan and all of the drippings it contains. Mastering the art of basic gravy is a valuable culinary skill that can elevate your cooking.
Whether you prefer a traditional brown gravy or a creamy white gravy, understanding the fundamentals of gravy-making, including the choice between water and milk and achieving the desired thickness, will allow you to create flavorful sauces that complement a wide range of dishes.
Explore various types of gravies to discover new flavors and enhance your culinary repertoire.
