Most Windows uses faced Modern Setup Host Has Stopped Working error while upgrading from old to the version of Windows. Let’s know why it happens. Windows 7/8/8.1 users don’t have to create a backup of their data before upgrading to Windows 10 as it won’t erase any data. And that’s the best part. But Windows XP/Vista users won’t be able to upgrade to Windows 10.
In that case, the users will have to perform a Clean Install. Before the clean install, the user must check the compatibility of the motherboard with the newer OS. When the users started to upgrade their Old Windows to Windows 10, they started facing the error ‘Modern Setup Host Has Stopped Working.’
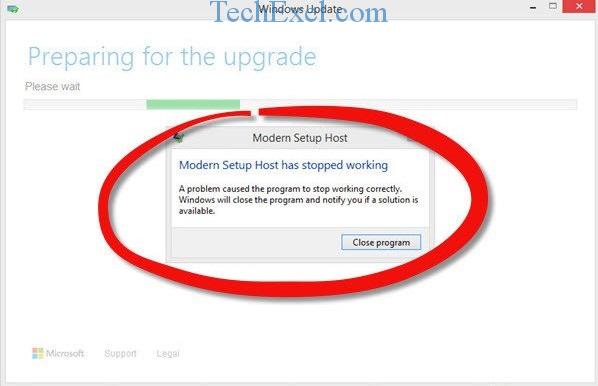
This issue pops-up when you are trying to upgrade your PC to Windows 10. It may occur because of Wrong system configurations, or some issue with the upgrade progress, etc.
Contents
How to Fix Modern Setup Host Has Stopped Working Error
Today, we’ll help you solve Modern Setup Host Has Stopped Working issue with the following methods. Let’s proceed.
Solution 1 ⇒ Check Hard Drive Space
Hard Drive is the location where the new Windows update will get installed. One of the causes of the error can be insufficient space in your Hard Drive. The media creation tool, used as one of the methods to upgrade to Windows 10, needs 8GB of space to download and install the update. Additionally, you will need a lot more free space because your applications and data are still left to be put into the hard drive.
Now, you must be thinking about how much free space do you need approximately for the smooth installation of Windows 10? Well, we advise you to have at least 17+ GB of storage space available for a smooth installation.
Some advice for you:
- Uninstall any applications or remove any data which is not used by you anymore.
- If there is some important data that you can’t afford to lose, you can back it up to cloud storage like Google Drive. Or back up your data in a Pendrive.
Solution 2 ⇒ Prepare Windows PC For Upgrade
Windows update could fail due to the interference of some background programs. So in this method, we will do some system changes by disabling services not relating to Microsoft, disabling startup programs, and changing regional settings of windows.
Now we will disable the services that are not needed during the startup process.
Step 1 ⇒ On the keyboard, press the Windows Key + R to bring up a Run box.
Step 2 ⇒ Type MSConfig in the box and hit Enter.
Step 3 ⇒ Now, under the General tab in system configuration, under Selective Startup, Uncheck the option labeled as Load Startup Items.
Step 4 ⇒ Next, go to the Services tab, tick the Hide All Microsoft Services option, and then click the Disable All button.
Step 5 ⇒ Go to the Startup tab and now click on Open Task Manager written in blue in the middle.
Step 6 ⇒ Now open the Startup tab in the Task Manager.
Step 7 ⇒ Now right-click on every startup item with the Enabled status and click on Disable.
Step 8 ⇒ Go back to the Startup Tab in System Configuration and click OK.
Now, we will change the Regional Settings of Windows.
If you are on Windows 7, follow the steps below:-
Step 1 ⇒ Press the Windows key + R to bring up the Run box. Now type Control in the Run box and hit Enter.
Step 2 ⇒ Now, click on the View By option at the top right corner and select Large Icons. Now, click on Region and Language.
Step 3 ⇒ Check if the System Language matches your default System UI Language. If the language differs, then set it back to the one which matches the System UI Language.
If you are on Windows 8/8.1, follow the steps below:-
Step 1 ⇒ Press the Windows key + R to bring up the Run box. Now type Control in the Run box and hit Enter.
Step 2 ⇒ Click on View By Category. And then click on Clock, Language & Region.
Step 3 ⇒ Click Region and choose the Location tab, and then under Home Location, choose the United States.
Step 4 ⇒ Click OK and now, under Clock, Language & Region, Click on Language to add one another Language.
Step 5 ⇒ Click on Add a Language, choose English and then click on Open.
Step 6 ⇒ Among the options, choose English (United States), and click on Add.
Step 7 ⇒ Go back to Languages, choose your previous language, and click Remove.
Step 8 ⇒ Restart your PC, Upgrade to Windows 10, and enable all the services, startup programs later on.
Solution 3 ⇒ Create a Bootable USB and Upgrade Your Machine To Windows 10
In this method, you will need to create a bootable USB flash drive by configuring your BIOS or UEFI, so that your PC can boot with the help of the USB drive.
After doing the above, boot your PC by using the USB Flash Drive, and Run the Upgrade Procedure.
Solution 4 ⇒ Run Disk Cleanup and Delete $Windows.~WS Folder
In this method, you will have to run a disk cleanup. It is a Windows utility tool that helps you to remove unnecessary files from your hard disk.
Follow the below steps to delete the folder:-
Step 1 ⇒ Press the Windows key + S on your keyboard to open the Search app.
Step 2 ⇒ Type Disk and press Enter.
Step 3 ⇒ Open Disk Cleanup and move to your system partition.
Step 4 ⇒ Select Clean Up System Files.
Step 5 ⇒ Check all the boxes available. Click OK.
Step 6 ⇒ Now, wait for the process to get over.
Then go to the $Windows.~WS directory and delete its contents.
Solution 5 ⇒ Resume Upgrade By Running setupprep.exe
This procedure is available only for Windows 7/8/8.1 users. And is one of the most efficient methods to solve the error as it resumes the process from the last operation, instead of starting a new process altogether. Follow the steps below:-
Step 1 ⇒ Proceed with the Windows upgrade with the Media Creation Tool.
Step 2 ⇒ When you get the error, close the Media Creation Tool.
Step 3 ⇒ Press the Windows Key + R and type C:\$Windows.~WS\Sources\Windows\sources\setupprep.exe in the Run box. Hit Enter to resume your Windows Upgrade.
Solution 6 ⇒ Use DISM To Repair Windows
DISM stands for Deployment Image Servicing and Management. This tool is integrated within Windows 10 and can help you solve the Modern Host Setup errors. If the failure is due to a corrupted windows update, this tool can help you fix it. Here are the steps to run the tool:-
Step 1 ⇒ Go to the Taskbar and Search for cmd.
Step 2 ⇒ Right-click command prompt and then choose Run as Administrator from the options.
Step 3 ⇒ If prompted to grant any permission, go ahead. Once the command prompt has opened, type the following commands And hit Enter.
DISM.exe /Online /Cleanup-image /Scanhealth
DISM.exe /Online /Cleanup-image /Checkhealth
DISM.exe /Online /Cleanup-image /Restorehealth
Do note that this process will take several minutes to complete. Do not interfere with the process. Once it finishes, check if the Modern Setup Host Has Stopped Working issue persists. If it does, try our next solution.
Solution 7 ⇒ Run System File Checker
System File Checker (SFC) is a tool that is used for fixing any functions of windows that are not working correctly, and it can restore your files.
The SFC command will scan all protected system files, and replace corrupted files with a cached copy that is located in a compressed folder. To run the command, follow the steps mentioned below:
Step 1 ⇒ Go to the Taskbar, Search for cmd, right-click on cmd, click on Run as Administrator.
Step 2 ⇒ In the command prompt, type sfc/scannow and hit Enter.
It should solve the Modern Setup Host has Stopped Working error. If not, proceed to the next method.
This methods also work on:
- Windows Key Not Working
- Update Failing with Error 0x8024200D
- Unexpected Store Exception
- WLDCore.dll is Missing
Solution 8 ⇒ Move User Folder To Default Location
If you recently moved your user profile to a different location, you will need to move it back to its original location, which is C:\Users\YourUserProfile
We are telling you to do this because it has been reported that if you move your user profile to a different partition, windows upgrade stops working and shows you the Modern Host Setup error.
After you have moved back the user profile to its original/default location, you need to run the windows upgrade again. Check if the error has been resolved or not. If it’s the latter in your case, try out our last method.
Solution 9 ⇒ Clean Install Windows 10
Now, after trying all the methods above, if you are still facing the Modern Setup Host Has Stopped Working error, then you might have to Reinstall Windows 10 Completely. As there are files that may be missing from the computer, and can’t be recovered using any software or troubleshooting tool, a clean Reinstall would do the trick.
As we mentioned above, don’t forget to check if the motherboard of your machine supports Windows 10. Secondly, take a backup of your data in a Pendrive or an External Harddisk so you won’t have to face any more trouble.
Recommendation:
- DX11 Feature Level 10.0 is Required to Run the Engine
- WOW51900319 (You Have Been Disconnected)
- WMI Provider Host High CPU Usage
- GeForce Experience Won’t Open
Conclusion
After all the troubleshooting methods we have told you, we are sure that the Modern Host Has Stopped Working error won’t cause you any more trouble and it should vanish. All of these methods are tried and tested by us, so you don’t need to worry about anything. If you are still facing any errors, feel free to contact us. We are always there to help!
