Internet issues have become common nowadays, and due to slight modifications in the PC/Laptop settings or improper functioning we face such internet issues.
However most people find this issue even when everything seems to look normal and functioning, but the internet doesn’t work, and sometimes this issue gets solved in no time, due to re-configuration of IP address.
In today’s digital age, a reliable internet connection is essential for work, communication, and entertainment. However, you may encounter various connectivity issues, one of which is the “No Internet Secured” error. This error can be frustrating, as it disrupts your ability to access the internet securely.
In this comprehensive guide, we will delve into the meaning of “No Internet Secured,” explore the common causes behind it, and provide solutions to help you resolve this issue and restore your secure internet connection.
Read Also:
Contents
What Does “No Internet Secured” Mean?
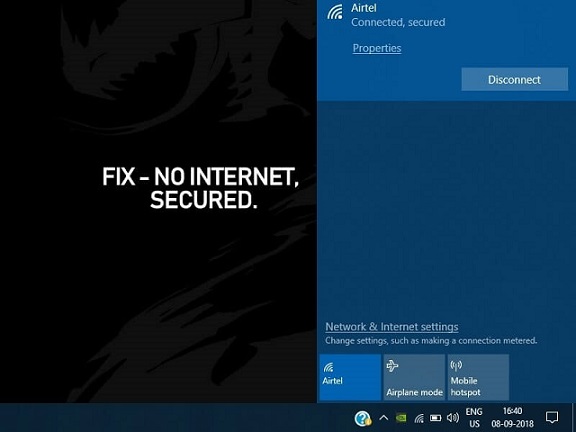
“No Internet Secured” is a network error message that typically appears on Windows devices, particularly when you attempt to connect to a Wi-Fi network. This error indicates that although your device is connected to the Wi-Fi network, it cannot access the internet securely.
In other words, your connection to the network is established, but there may be issues preventing data from flowing securely between your device and the internet.
Common Causes of “No Internet Secured” Error
Several factors can contribute to the “No Internet Secured” error:
- Incorrect Wi-Fi Password: Entering an incorrect Wi-Fi password when connecting to a network can lead to this error.
- Router Configuration Issues: Problems with your router’s settings or firmware can disrupt the secure internet connection.
- IP Address Conflict: If there is an IP address conflict on your network, it can prevent secure internet access.
- Network Adapter or Driver Problems: Outdated or corrupted network adapter drivers can cause connectivity issues.
- Firewall or Security Software: Overzealous firewall or security software on your device may block internet access.
- Network Profile Corruption: Corrupted network profiles can interfere with secure internet connectivity.
How to Resolve “No Internet Secured” Error
To troubleshoot and resolve the “No Internet Secured” error, follow these steps:
- Verify Wi-Fi Password:
- Ensure that you have entered the correct Wi-Fi password when connecting to the network.
- Restart Your Router:
- Power cycle your router by unplugging it from the power source, waiting for a minute, and then plugging it back in.
- Allow the router to fully restart and reconnect your device.
- Update Router Firmware:
- Access your router’s settings via a web browser (usually by entering an IP address like 192.168.1.1).
- Check for firmware updates and apply them if available.
- Release and Renew IP Address:
- Open Command Prompt (Windows key + X, then select “Command Prompt (Admin)”).
- Type the following commands, pressing Enter after each:
ipconfig /release
ipconfig /renew
- Restart your computer.
- Update Network Adapter Drivers:
- Visit your computer manufacturer’s website or the network adapter manufacturer’s website to download and install the latest network adapter drivers.
- Disable Firewall or Security Software:
- Temporarily disable any firewall or security software to check if it is causing the issue. Ensure you re-enable it afterward for security.
- Forget Network and Reconnect:
- In Windows, go to “Settings” > “Network & Internet” > “Wi-Fi.”
- Click on your network, then click “Forget.”
- Reconnect to the network and enter the password.
- Create a New Network Profile:
- If previous steps don’t work, create a new network profile:
- Open Command Prompt (Admin) again.
- Type the following commands:
netsh wlan delete profile name="YourNetworkName"
netsh wlan add profile filename="C:\Path\To\YourWiFiProfile.xml"
- Reconnect to the network.
- If previous steps don’t work, create a new network profile:
How To Fix The No Internet Secured Error
Most of the Windows 10 users face this issue like ‘No Internet, Secured’ this might be due to various reasons, to help you solve this issue we have some solutions listed below.
Solution 1: Change WiFi Network Adapter Properties
Firstly, try out this simple method, as a simple Network and Internet troubleshoot can make it back online, so if you find your internet is connected and not working follow this:
Step 1: Right-click on the WiFi icon on the bottom corner of the screen
Step 2: Click on “Troubleshoot” and hopefully, the issue might get solved.
OR
Step 1: Firstly you have to open the “Run” by typing Run in the search bar or just press “Windows + R”, and run will open.
Step 2: Now type “ncpa. cpl” and click “OK”.
Step 3: Choose your internet connection, right-click on it and select “Properties”.
Step 4: Now look for the section called “WiFi Properties”, and check whether the following options are checked,
- Client for Microsoft Networks
- File and Printer Sharing for Microsoft Networks
- Link-Layer Topology Discovery Mapper I/O Driver
- Internet Protocol Version 4 (TCP/IPv4)
- Internet Protocol Version 6 (TCP/IPv6)
- Link-Layer Topology Discovery Responder
Make sure all these options are checked, if not checkmark them all and give “OK”.
Solution 2: Reset Your Connection
Most of the time due to long time usage of the internet without any break (not switching off the router for a long-time) might also cause some issues, so to get the connection back online follow these steps:
Step 1: Click on the WiFi icon on the bottom right corner of the screen, and click “Forget” on your WiFi network connection.
Step 2: Now activate the “Airplane Mode”, to freshly re-establish the connection to the Laptop/PC.
Step 3: Disconnect the wires of the internet connection that are connected to the Laptop/PC, if it’s connected through WiFi then no worries.
Step 4: Now Turn Off the Router and unplug the connection from the socket for a while and then plug it back in and turn it On.
Step 5: After the Router is booted and ready, Turn Off the Airplane Mode on Laptop/PC.
Step 6: Now click on the WiFi icon and select your internet connection.
After doing as directed above, this issue might get solved and your internet must be working well, if not don’t worry there are many solutions given below, try them too.
Solution 3: Update Your Network Adapter’s Driver Software
Just like the apps in your mobile wont work if not updated the smaes goes here too. So to make sure the drivers are updated follow the steps,
Step 1: Firstly open “Run”, through Win+R or Type “Run” in search bar.
Step 2: Simply type “Device manager” or “devmgmt.msc” in Run search bar and give enter.
Step 3: Now look for Network Adapters in the device manager.
Step 4: Go to Network Adapters section and select your currently using network adapter.
Step 5: Right-click on your network adapter and choose “Update Driver”.
Step 6: A window will open now select “Search automatically for updated driver software”.
If any updates are found then it will take some time for updating, however, if it still doesn’t work then make sure that you have the latest one because sometimes if you have the older version then by performing the above steps also you won’t get the expected results hence, always keep your Software, drivers updated.
So always check for the updates on the Windows 10 official website and keep your system and drivers updated.
Solution 4: Change Your Network’s IP Cofiguration
If the issue is caused by the invalid IP Adress then it can be solved easily by following this steps,
Step 1: At the button right of the screen, right-click on Network icon.
Step 2: Now click on “Open Network and Internet settings”.
Step 3: Look for “Change Adapter settings” at the button or left side.
Step 4: Right-click on your network and click on Properties.
Step 5: To disable the Internet Protocol Version 6 (TCP/IPv6) uncheck the checkbox, and give OK.
Step 6: Close the windows opened and restart your computer, now check if the connection was re-established again.
Solution 5: Uninstall and Re-install Your Computer’s Network Adapter
Follow the steps to uninstall and re-install the network adapters to get your internet connection back to working
Step 1: Search “Device Manager” in the Window’s search bar.
Step 2: To open the options in Network Adapter double-click on it.
Step 3: Check for your network adapter and then right-click on it and select Uninstall.
Step 4: Now enable the “Delete the driver software for this device” option by checking the checkbox and click OK.
Step 5: Wait for the driver to get uninstalled as this may take some time.
Step 6: After the network adapter has been uninstalled, now click Action and select Scan for hardware changes, as the Windows will now check for the missing Network adapter and re-install it again.
Step 7: Now wait for the installation process to happen and once it’s done no close all the windows and Restart your PC/Laptop.
After it’s booted up check whether the connection has been restored and is working.
Read Also:
Conclusion
So these were some of the simple solutions for the ‘No Internet, Secured’ problem. You will get the desired result but make sure you follow the steps with utter precision and also check whether your router is working fine once again to just make sure.
Encountering the “No Internet Secured” error can be frustrating, but with the right troubleshooting steps, you can quickly resolve it and regain secure internet access. Start by verifying your Wi-Fi password and ensuring your router is functioning correctly.
If the issue persists, address problems like IP address conflicts, network adapter driver issues, and firewall settings. By following these solutions, you can enjoy a secure and uninterrupted internet connection on your Windows device.
