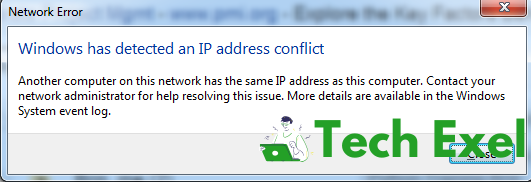
We get the Windows Has Detected An IP Address Conflict error when two computers on the same local network have the same IP address. When this occurs, both the computers will not be able to connect to the network or perform other network operations.
Contents
How to Fix Windows Has Detected An IP Address Conflict Error
There are a few ways where we can fix this problem. We can even try to restart our system and automatically solve Windows Has Detected An IP Address Conflict error. Let’s discuss some of the methods to solve this problem of deleted IP address.
Solution 1 ⇒ Restart the Router
Restart or reboot the router is the easiest way to solve this problem within no time. If we come across a situation where our system does not connect to the internet network or our music system does not respond because of poor network service. Then we have to follow these instructions to restart our router more easily.
Step 1 ⇒ Remove or unplug the router and the modem. Also, make the power off for some time. Wait at least 30 seconds; this makes the system to cool down and work more efficiently than ever before.
Step 2 ⇒ Plug in the modem. And wait for 60 seconds, during this time, the modem authenticates with our ISP.
Step 3 ⇒ Plug in the router. Wait for 2 minutes. It gives the router to make it restart. When the router and modem restarts, test again to see whether the problem is fixed or not.
Solution 2 ⇒ Release and Renew the IP address
It is the most effective and should be known to every person who works on a computer. It is handy for making our system reconnected to the internet or the local LAN network. To renew the IP address,
Follow the given instructions below;
Step 1 ⇒ Go to Start, then run and open a new command prompt window. Then type the following command.
ipconfig /renew
Step 2 ⇒ We can review all IP configuration information by using the all command.
Step 3 ⇒ To release an IP address, type “ipconfig/release,” this command will release the IP address for all connected networks.
Solution 3 ⇒ Delete the Static IP
An internet protocol (IP) remains constant and make our computers more suitable to become hacked. It is very much preferable to use a dynamic IP address, which changes each time we log in to the network. Follow the given steps and get the required output.
Step 1 ⇒ Go to Start and open the “control panel” click “network and internet” and then select “Network and Sharing center.”
Step 2 ⇒ Click on the task “Change adapter settings” and change the properties.
Step 3 ⇒ Select “Internet protocol version 4” and then click properties, delete the numbers in “IP address” this removes the static IP address from our system.
Step 4 ⇒ Click the option “obtain an IP address automatically” this will make our computer to use a dynamic IP address.
Solution 4 ⇒ Disabling IPv6
IPv6 increases the number of IP addresses available and improves IPv4’s routing and network abilities. To disable this, we have to follow the following steps
Step 1 ⇒ Select the control panel from the Start menu. Open network and sharing center. On the left, select “change adapter settings.”
Step 2 ⇒ Right-click the connection for which we want to disable IPv6 and select properties.
Step 3 ⇒ Uncheck Internet Protocol version 6 (TCP/IPv6) and click the OK button.
This makes us disable the IPv6 from our system.
Solution 5 ⇒ Disable and Enable the Network Adapter
The network adapter is one of the essential parts of our computer. This connects our system to our local network, and thus we get the internet. Sometimes we have to turn off or disable the network to save battery life, or it may be any other reason. To disable the network adapter using the control panel, follow these steps
Step 1 ⇒ Open Setting and click network and security. Click on status. We can also access by right-clicking the network icon in the taskbar and selecting the network and internet setting options.
Step 2 ⇒ Click on change adapter options, right-click the network adapter and select the disable option.
For enabling the adapter to follow these steps using the control panel;
Step 1 ⇒ Open sitting and click network and security. Click on the status and select the change adapter options. Right-click on the network adapter. After that, select the enable option.
Step 2 ⇒ We can search for device manager and click the top result. Right-click the adapter that we want and select the enable device option.
Recommendation:
- A Problem Has Occurred in Bit Defender Threat Scanner
- YouTube Videos Black Screen
- Charger Plugged in But Not Charging
- Res://aaResources.dll/104
Conclusion
There are different methods to fix the problem of deleting the IP address in the windows of our system. By using the instructions or methods mentioned above will help us to do so. An Internet Protocol address (IP Address) is numerical or each device connected to a computer network. It uses the internet for communication.
It also has a dark side; that is, an IP address conflict occurs when two systems on a network are assigned to the same IP address. Even that system can also be a mobile phone. Hence it is essential to fix the issue so that we will have a good internet connection.
