High fan speed, above 50% CPU storage, slow & unresponsive system and high temperature are the problems caused due to Windows Modules Installer Worker Windows 10 High CPU. You get frustrated, and annoyed, but don’t worry anymore I have mention below solutions to this problem.
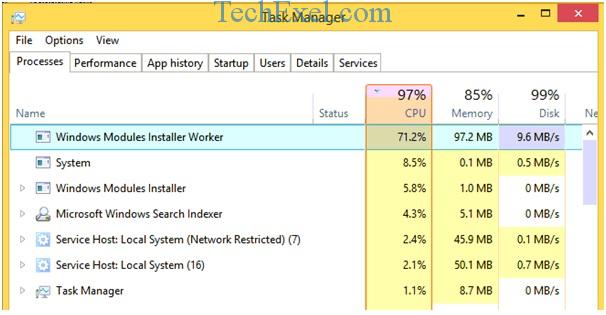
Windows Modules Installer Worker is a windows service which checks & installs the latest updates automatically, makes an environment to download these updates and fix the bugs to run the system smoothly. All these processes occur in the background which leads to higher CPU usage. More CPU storage consumption ultimately leads to a slow and unresponsive operating system as other applications won’t work properly. Follow these steps to fix this error.
Contents
How to Fix Windows Modules Installer Worker High CPU Error
Solution 1 ⇒ Disable Windows Update Service
Step 1 ⇒ First open the Start menu.
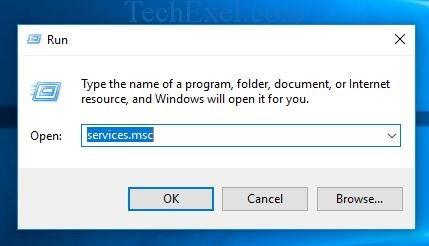
Step 2 ⇒ Then type Run in the search box and press Enter key.
Step 3 ⇒ Then in the Run window type services.msc and press Enter key.
Step 4 ⇒ A Services window will open, find Windows Modules Installer.
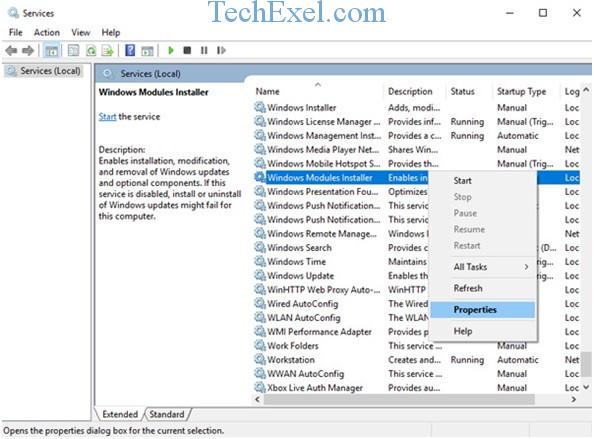
Step 5 ⇒ Then double-click on it to open its properties.
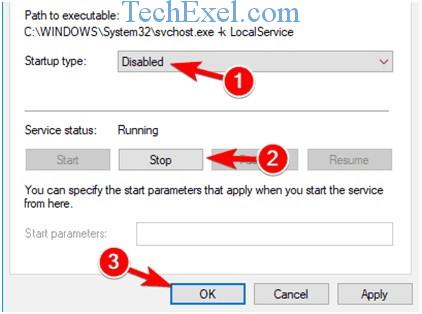
Step 5 ⇒ Then select Disabled in Startup type. Stop running services. Now click on the Apply icon and save the changes.
Solution 2 ⇒ Modify Internet Settings
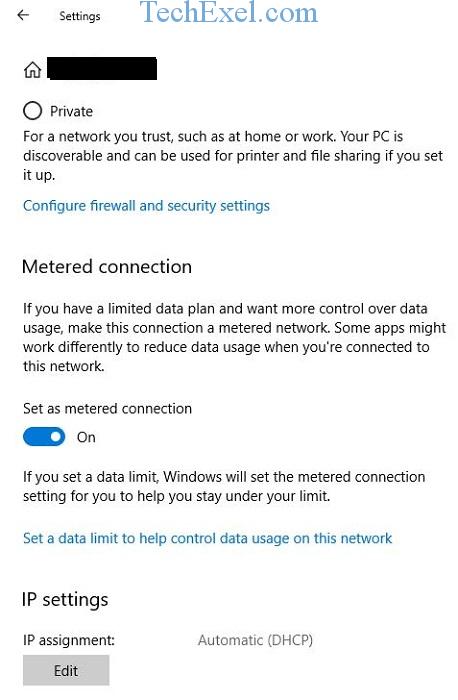
For Wi-Fi Users
Step 1 ⇒ First click on the Wi-Fi network sign and select your connection.
Step 2 ⇒ Open its Properties tab.

Step 3 ⇒ Finally toggle the Set as a metered connection to On button.
For Ethernet Users
Step 1 ⇒ First open the Start menu.
Step 2 ⇒ Then type Run in the search box and press the Enter key.
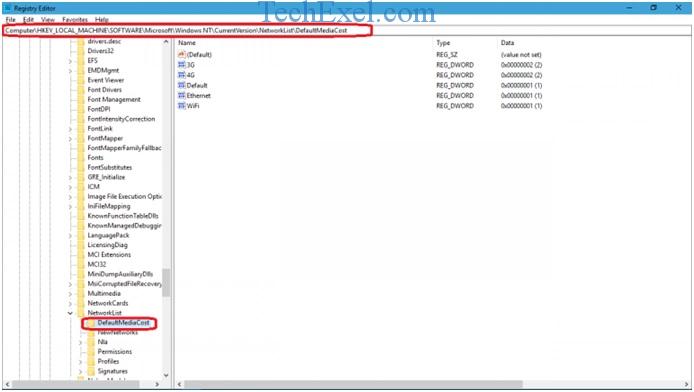
Step 3 ⇒ Then in the Run window type regedit and click OK.

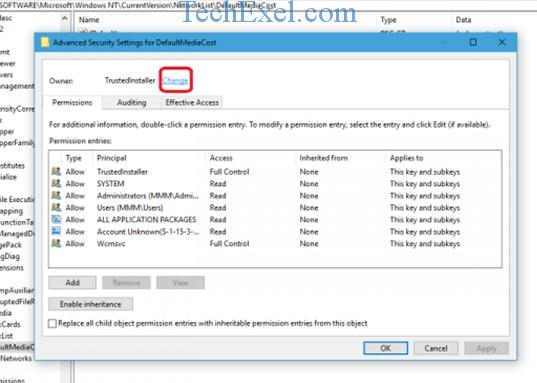
Step 4 ⇒ Follow this path: HKEY_LOCAL_MACHINE > SOFTWARE > Microsoft > Windows NT > CurrentVersion > NetworkList > DefaultMediaCost.
Step 5 ⇒ Then do a Right-Click on DefaultMediaCost tab and select Permissions.
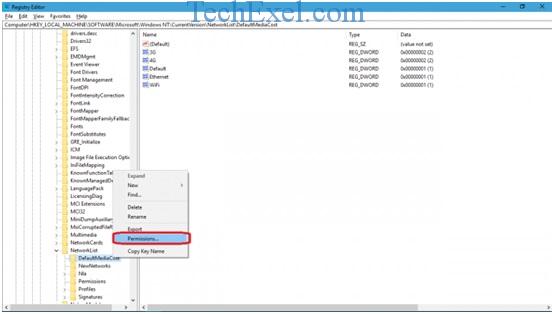
Step 6 ⇒ In the Permissions window click on Advanced tab.
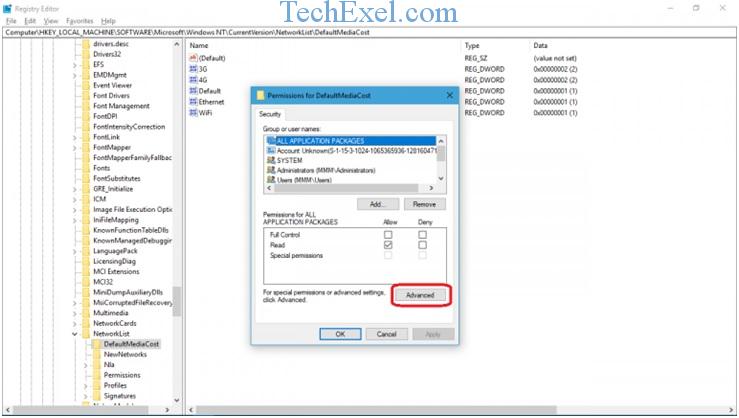
Step 7 ⇒ Afterwards click the Change link.
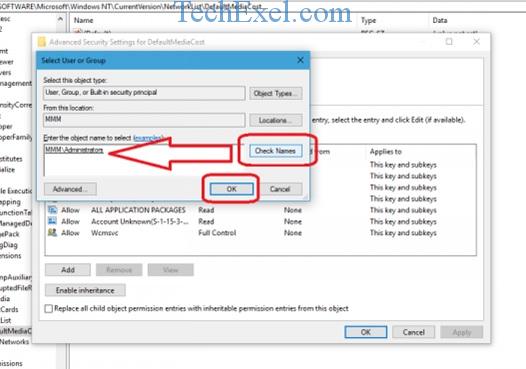
Step 8 ⇒ Enter your username and click OK.
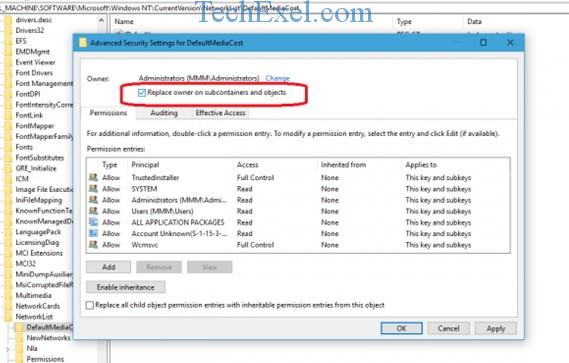
Step 9⇒ Now in the Advanced Settings tab tick the Replace owner on sub containers and objects box.
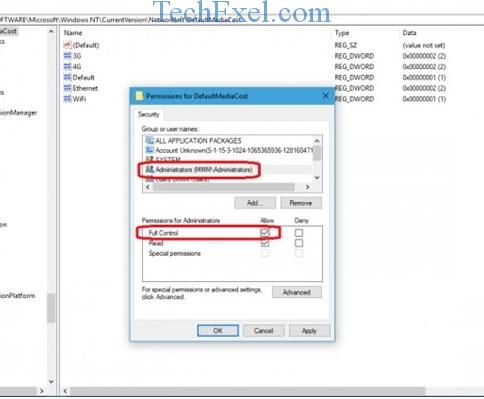
Step 10 ⇒ Afterwards again open the Permissions tab and click on the Username (Administrator). Tick the box against Full Control and save.
Step 11 ⇒ Afterwards open the Ethernet tab and type 2 in Value data instead of 1. Finally, close everything and Restart your operating system.

Solution 3 ⇒ Clean Boot Your System
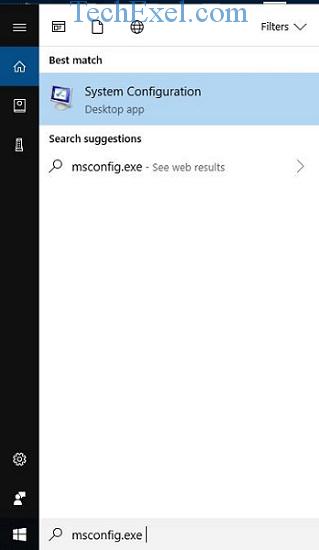
Step 1 ⇒ First open the Start menu.
Step 2 ⇒ Then type msconfig.exe and open it.
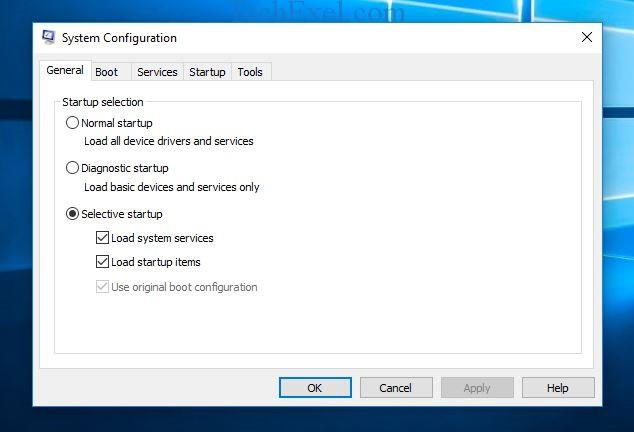
Step 3 ⇒ Finally, select the Normal Startup and follow the on-screen instructions.
Recommended:
- Microsoft Compatibility Telemetry High Disk Usage
- CompatTelRunner.exe High CPU and Disk Usage
- WMI Provider Host High CPU Usage
- Modern Setup Host Has Stopped Working
Conclusion
These are the best solutions to fix Windows Modules Installer Worker Windows 10 High CPU error in your Windows 10. You know its importance and how to handle it smoothly. Try to update manually once in a month to fix bugs and work efficiently. Do post your queries.
